Did you recently notice that your patio heater was not working great? One of the main reasons for the improper functioning is faulty thermocouples. These are safety devices that ensure the pilot light gets lit.
In our troubleshooting guide, we will provide detailed information about patio heater thermocouples and where to locate them.
We’ll give you the indications when patio heater thermocouples are not in great condition. Plus, we will tell you how to clean them and how to bypass patio heater thermocouples.
Quick Navigation
- Meaning, Calibrations, and Designs
- The Time Constant of Thermocouples
- What Do Thermocouples Do on Patio Heaters?
- Should Flames Touch Thermocouples?
- What Are the Symptoms of Bad Thermocouples?
- How Do You Test Patio Heater Thermocouples?
- Can You Bypass Thermocouples on Patio Heaters?
- How Do You Clean a Thermocouple on a Propane Heater?
- How Do You Fix a Patio Heater That Won’t Stay Lit?
- Our Top Pick
- Conclusion
Meaning, Calibrations, and Designs
Though they may be tiny electrical devices, thermocouples are one of the most crucial patio heater parts.
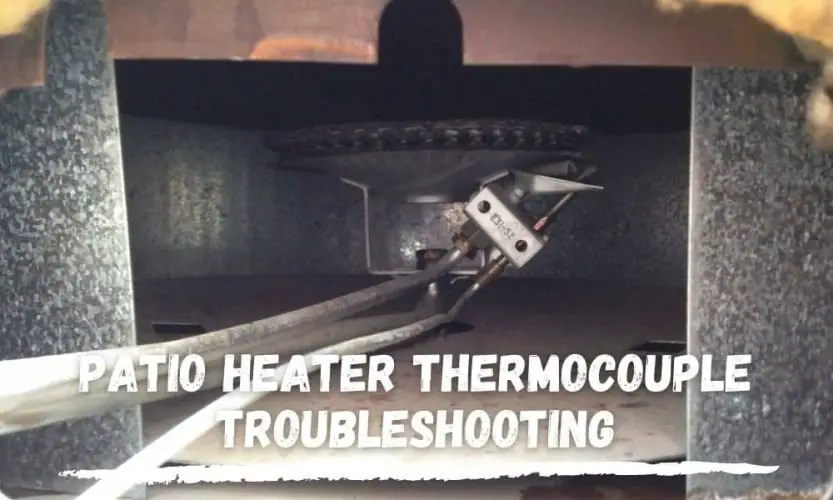
If you don’t know where to look for patio heater thermocouples, check around your heater’s flame. They have copper casings that you can sport effortlessly.
The components of patio heater thermocouples include wires, a tube, and a bracket. The tube is above the bracket. Under the bracket are copper lead wires which connect to the gas valve. A nut binds the wires and a bracket together. However, designs may vary slightly.
A wire’s diameter determines its temperature range. Each calibration has a unique temperature range.
Typically used thermocouples are the base metal thermocouples. Its categories are E, J, K, T, and N. Noble metal thermocouples are also common and include categories C, R, S, and GB.
The Time Constant of Thermocouples
The time constant is the time required for the temperature sensor to attain a particular temperature change(63.2% of the step change). You’ll need five-time constants for the temperature sensor to attain the full step change value, i.e., 100%.
The thermocouple joint(exposed) will give the quickest response. Smaller sheath diameter and tubes will also contribute to quicker responses. However, this may lower the maximum temperature you can attain.
What Do Thermocouples Do on Patio Heaters?
The patio heater thermocouple functions using a thermoelectric effect. It responds to temperature changes by voltage generation.
It contains two conductors(wires from different metals). The junction between these two wires is the measuring point. The other ends of the wires are for attaching to the voltage reader.
The measuring point detects a temperature change leading to voltage creation. This is due to the varying electron densities of the different wires. The created voltage then gets measured.
Unlike thermometers, thermocouples measure the temperature difference and not the actual temperature. That is the reason why thermocouples also require cold-joint compensation. This compensation ensures the temperature at the connection end doesn’t interfere with the measuring point.
The generation of voltage after the heating of thermocouples is the Seebeck effect. The voltage activates the control valve that supplies the pilot light to:
- Open during high temperature allowing gas to be released
- Close when a direct heat source lacks.
Should Flames Touch Thermocouples?
Yes, the pilot flame touches thermocouples at a certain level. If flames are weak and blue they hardly reach thermocouples, therefore, they should be strengthened. If flames extend past thermocouples, they are stronger. The perfect position is when flames cover the tops of thermocouples and burn with yellow tips.
What Are the Symptoms of Bad Thermocouples?
There are a few signs you can note in defective thermocouples:
- Tube contamination signs- these may include things like cracks, discoloration, or pinholes.
- Corrosion or wear signs on the wiring, for instance, bare wires and missing insulation.
- Physical damage to the connectors. Faulty ones may interfere with the outcome of the test readings.
How Do You Test Patio Heater Thermocouples?
What You’ll Need for the Test
- Multimeter
- Wrench
- Flame source, i.e., lighter or candle
The Process
The open-circuit test is quite a straightforward process, but it is best to look for a professional if you lack experience.
- Make sure to turn off your gas flow before conducting the test since you’ll have to remove the thermocouple.
- To remove the patio heater thermocouple, unscrew the connection nuts, and copper leads, followed by the bracket nuts.
- Set your meter to ohms. Touch the two leads of the meter. Your reading should be zero. If so, turn your meter back to volts.
- Turn the flame source on to conduct the actual test.
- Heat the thermocouple to a considerable level by placing it in the flame.
- Attach the leads of your multimeter to your thermocouple. Place one lead on one of its sides. Attach the next lead to the end at the flame position.
- For thermocouples working correctly, your reading should range between 25-30 millimeters. If you’re reading it below 25 millimeters, you should purchase a new model.
Can You Bypass Thermocouples on Patio Heaters?
Constant heat supply ensures that your patio heater pilot light is lit at all times. If your unit is receiving no heat, this won’t be so.
To temporarily sort the situation, you can bypass thermocouples until you have funds to replace them.
Here are the items you’ll need for bypassing thermocouples:
- 8mm wrench
- 13mm socket wrench
- Pliers
To bypass the thermocouple:
- Move the tilts switch wire aside.
- Remove your thermocouple from the heater using an 8mm wrench.
- Pull the valve housing aside using your 13mm socket wrench. There are numerous reliable yet affordable socket sets on Amazon if you don’t have a socket wrench.
- Remove the valve using your pliers. The valve is the part that pushes in and out with your thermocouple. Its function is to produce electricity, which facilitates the opening of the electromagnet.
- Put your thermocouple back into position.
At this point, the gas should flow to your burner directly as soon as you turn it on.
How Do You Clean a Thermocouple on a Propane Heater?
The items you’ll need to clean the thermocouple of your propane heater include:
- Steel wool
- Dry sponge
- Pencil eraser
- Screwdriver (you can find these on Amazon)
Here is the procedure for cleaning thermocouples:
- Cut out the fuel supply of your propane heater.
- Use your screwdriver to loosen the screws on the thermocouple.
- Remove it from the pilot assembly.
- Gently rub it with your steel wool or the rougher side of your sponge.
- Rub until you remove all the soot on its surface.
- Clean the threads of its attachment screw using your pencil eraser.
- Once your unit is clean, put it back on the pilot assembly.
Safety tip: Don’t use cleaning products on thermocouples as some may contain flammable materials.
How Do You Fix a Patio Heater That Won’t Stay Lit?
Patio heaters that won’t stay lit may be due to:
- If your propane tank is empty or your natural gas line is cut off
- The clogging of thermocouples
We have already covered how to clean thermocouples. As for an empty tank, get a replacement.
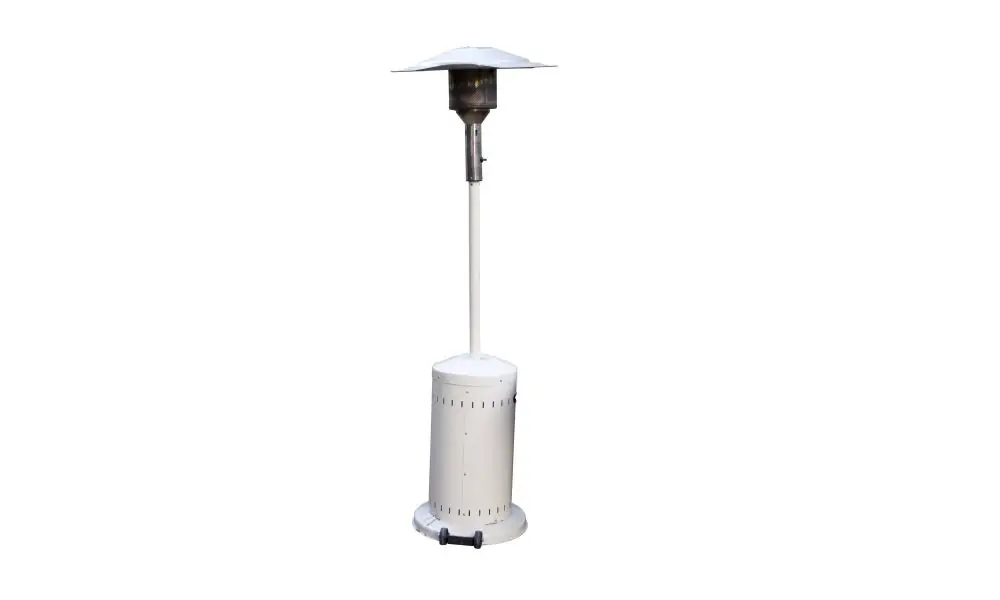
Our Top Pick
If you want to replace your unit, you can check out the Hiland THP-Thermo Thermocouple, ideal for any tall patio heater.
Prices pulled from the Amazon Product Advertising API on:
Product prices and availability are accurate as of the date/time indicated and are subject to change. Any price and availability information displayed on [relevant Amazon Site(s), as applicable] at the time of purchase will apply to the purchase of this product.
Besides the praise-filled customer reviews, the features that make us love this item include:
- Tall Heater Thermocouple
- The sensor activates the main control valve after the pilot light is lit.
- Allows the main gas to be released.
- 2 connectors for attaching to an anti-tilt device.
- 18 in long.
- M8 (metric) connection.
Conclusion
Taking care of thermocouples to get maximum warmth from patio heaters is quite simple. Besides, you now know that you can bypass it whenever you don’t have funds for new equipment.
What new challenges concerning outdoor patio heaters are you facing? You can contact us via our contact form if you have any inquiries about patio heating. Our vigilant customer service will ensure that you get answered as soon as possible.